PlayStation Vita Motherboard Replacement Complete Guide
Overview
Bricked! My PSV is completely dead! Worked fine yesterday, today suddenly won't turn on, pressing power button feels like pressing a rock—no response at all! Charging light doesn't light up, no response when connected to computer, completely a 'high-tech brick'! What's worse, there were various small issues before: WiFi cutting in and out, game stuttering, occasional auto-reboots... now finally total strike! Will my Persona 4 save be lost forever? No way! Today I must give my PSV a 'brand new brain' and bring it back to life!
Required Tools
- Phillips screwdrivers (PH00, PH000)
- Plastic spudger
- Tweezers
- New PS Vita motherboard
- Anti-static wrist strap (MANDATORY)
- Anti-static mat (recommended)
- Label paper (for marking ribbon cables)
Safety Warnings
⚠️ HIGHEST LEVEL MOTHERBOARD REPAIR WARNING ⚠️
- ESD protection mandatory: Motherboards are extremely sensitive to static electricity, must have full protection
- Power off operation: Ensure complete power disconnection, battery must be disconnected
- Component storage: All screws and small parts must be properly stored
- Ribbon cable care: All ribbon cables are very delicate, handle with extreme gentleness
Detailed Steps
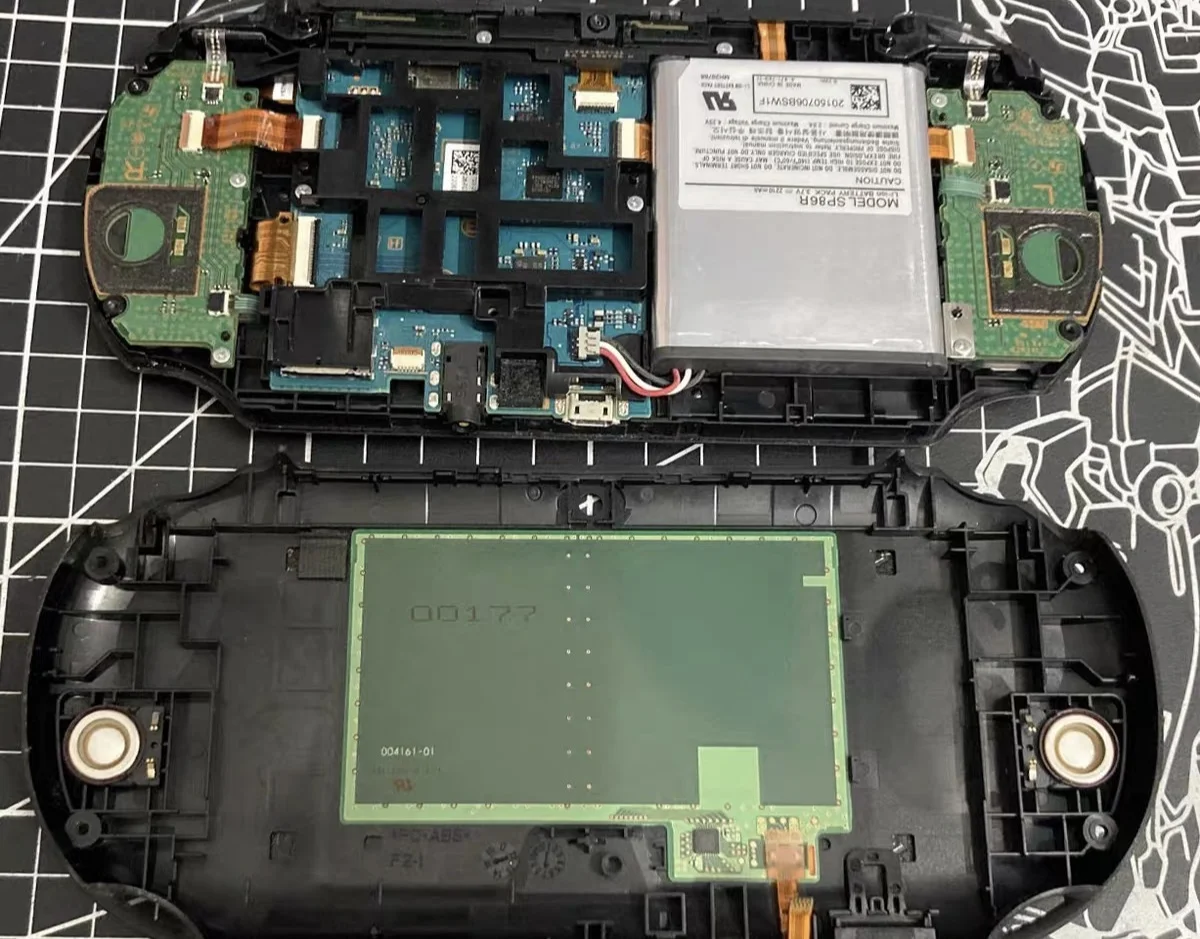
 PS Vita motherboard front view - Note the complex multi-layer PCB design
Step 1: Comprehensive Preparation
- Completely power down PS Vita
- Disconnect all external devices
- Lay out anti-static mat on work surface
- Wear anti-static wrist strap and connect to ground
- Prepare label paper to mark all ribbon cables
Step 2: Remove Rear Panel
- Remove rear panel according to model
- Carefully detach rear panel
Step 3: Disconnect All Power Sources
- Disconnect battery connector
- Ensure device is completely powered off
Step 4: Label and Disconnect All Ribbon Cables
CRITICAL: Label position and orientation of each ribbon cable before disconnecting
- Screen ribbon cable: Label as "Screen"
- Button ribbon cables: Label as "Buttons"
- Speaker ribbon cable: Label as "Speakers"
- Camera ribbon cable: Label as "Camera"
- Other ribbon cables: Label each individually
Step 5: Remove Mounting Screws
- Motherboard secured by multiple screws
- Use Phillips screwdriver to remove all screws
- KEY: Store screws by position categories
- Record each screw's position and length
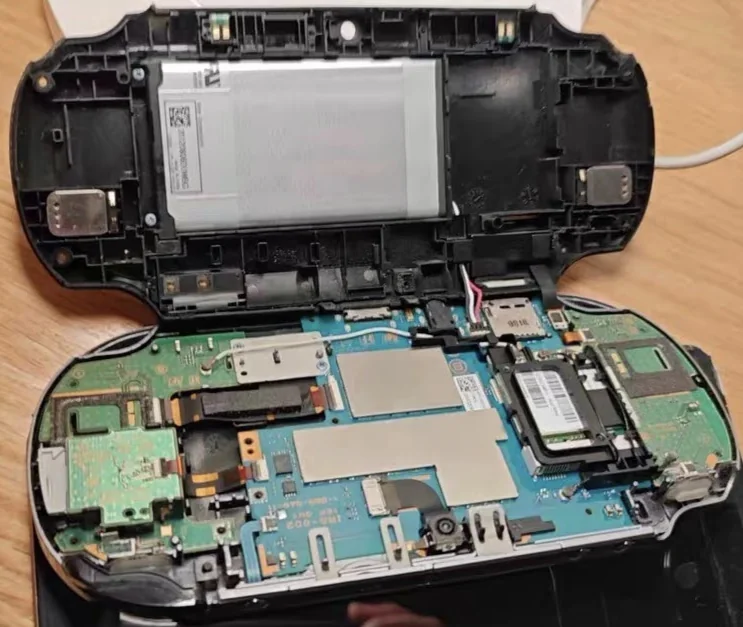
Step 6: Remove Old Motherboard
- Check for any remaining connections
- Gently lift one corner of motherboard
- Slowly remove motherboard from frame
- Avoid touching any components
- Place old motherboard in anti-static bag
Step 7: Install New Motherboard
- Remove new motherboard from anti-static bag
- Check new motherboard for obvious damage
- Align new motherboard with mounting position
- Gently place into frame
- Ensure all interface positions aligned
Step 8: Reconnect All Ribbon Cables
Reconnect according to labels:
- Screen ribbon cable: Carefully insert, lock latch
- Button ribbon cables: Ensure correct orientation
- Speaker ribbon cable: Connect securely
- Camera ribbon cable: Connect properly
- Other ribbon cables: Connect each one
Step 9: Final Testing and Assembly
- Connect battery, power on to test basic functions
- If normal, install all components
- Install rear panel
- Perform comprehensive functional testing
Post-Installation Comprehensive Testing
- Basic function test: Power on, system, display, sound
- Hardware function test: All buttons, joysticks, cameras
- Performance test: Games, video, multitasking
- Durability test: Extended operation, multiple reboots
Repair Difficulty: ★★★★★ (Extremely Difficult) Required Time: 2-3 hours Success Rate: Experienced users 70%, beginners below 30%
Final Recommendation: Unless you have extensive electronics repair experience and the device has special value to you, do NOT attempt motherboard replacement yourself.