PSP 1000 Motherboard Repair Complete Guide
PSP 1000 Black Console
Your PSP 1000 has strange issues: won't power on, frequent crashes, partial function loss, or complete bricking. These problems often originate from the motherboard. As the PSP's core, motherboard repair requires electronics skills but isn't impossible!
Required Tools
- Phillips screwdriver, PH00 size
- Plastic spudger or guitar pick
- Digital multimeter
- Soldering iron and solder
- Hot air station (for BGA work)
- Magnifier or microscope
- Isopropyl alcohol and cotton swabs
- Flux and desoldering braid
- Anti-static gloves and mat
- Temperature-controlled soldering station (recommended)
Repair Steps
1. Safe Disassembly and Motherboard Removal
- Complete power removal: Remove battery and all removable parts
- Complete disassembly: Follow standard PSP teardown procedure
- Disconnect all connections:
- Screen ribbon cable
- Button ribbon cables
- UMD drive ribbon cable
- Speaker ribbon cable
- WiFi module ribbon cable
- Remove motherboard: Remove all motherboard mounting screws
- Extract motherboard: Carefully remove, avoid bending
2. Motherboard Visual Inspection
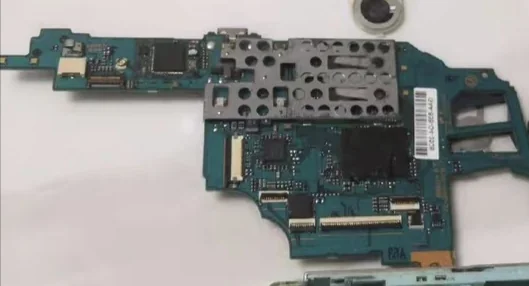
 PSP 1000 motherboard front view - Note the main chip locations
- Visual check:
- Check for burn marks
- Check capacitors for bulging/leaking
- Check chips for physical damage
- Check solder joints for cracks
- Smell check: Burnt electronics odor
- Touch check: Gently touch main chips, check for abnormal heat
3. Power Circuit Check
Battery power section
- Measure battery connector: Check battery contact voltage
- Check fuses: Locate and test motherboard fuses
- Check charging chip: Inspect charging management chip circuit
- Check DC-DC converters: Measure all voltage output points
Voltage measurement points
| Test Point | Normal Voltage | Function |
|---|---|---|
| Battery connector | 3.6-4.2V | Battery input |
| Main power output | 5.0V | System main power |
| Core voltage | 1.2V | CPU/GPU power |
| Memory voltage | 2.5V | Memory power |
| Screen power | 3.3V | Screen backlight power |
4. Common Fault Repair
Fault 1: Complete no power (black brick)
- Check power button: Measure button functionality
- Check crystals: Check 32.768kHz and 22.xxxMHz crystals
- Check power chip: Inspect power management chip
- Check BIOS chip: Check firmware integrity
Fault 2: Crashes after power-on
- Check memory: Run memory test program
- Check CPU power: Measure CPU power stability
- Check cooling: Inspect thermal paste and heatsink
- Check clock signals: Check clock generator
Fault 3: Partial function failure
- WiFi not working: Check WiFi module and antenna
- Audio issues: Check audio chip and speakers
- USB not recognized: Check USB port and chip
- Button failure: Check button ribbons and connectors
5. Chip-Level Repair
BGA chip rework
- Apply flux: Apply flux around chip perimeter
- Even heating: Use hot air station for uniform heating
- Gentle push: Use tweezers to gently nudge chip
- Cool and inspect: Check solder quality after cooling
SMD component replacement
- Mark orientation: Record component orientation
- Heat removal: Remove old component with hot air or iron
- Clean pads: Clean pads with desoldering braid
- Solder new component: Align and solder new component
PSP 1000 Motherboard Architecture
🏗️ Main Chip Overview
- MIPS R4000 CPU: 333MHz, PSP's brain
- Media Engine: Handles media decoding
- GPU: Graphics Processing Unit
- Memory: 32MB (4MB VRAM)
- Power management chip: Manages all power
- Audio chip: Wolfson WM8750
- WiFi chip: Marvell 88W8385
🔌 Motherboard Interface Guide
- Power connector: Battery and charger interface
- Screen connector: LCD screen connection
- UMD connector: UMD drive connection
- Button connectors: All button connections
- Expansion connectors: Memory Stick and WiFi module
Repair Difficulty: ★★★★★
Estimated Time: 4-8 hours
Success Probability: 50% (simple faults), 20% (chip-level faults)
🔧 Power Circuit Deep Repair
Charging circuit failure
- Symptoms: Won't charge, charge light doesn't illuminate
- Check points:
- Charging port integrity
- Charging fuse continuity
- Charging management chip
- Related capacitors
- Repair: Replace damaged components, repair circuit
Battery detection failure
- Symptoms: Inaccurate battery display, sudden shutdown
- Check points:
- Battery detection resistors
- ADC detection circuit
- Related filter capacitors
- Repair: Replace detection resistors, repair circuit
🛠️ BIOS Recovery and Programming
If motherboard is bricked, BIOS recovery may be needed:
Hardware BIOS programming
- Required equipment: Programmer or test jig
- Extract BIOS: Extract BIOS from working PSP
- Write to chip: Program BIOS to faulty motherboard chip
- Risk: Permanent damage if done incorrectly
Software recovery
- Pandora battery: Create magic battery
- Recovery mode: Enter recovery mode to flash firmware
- Prerequisite: Basic motherboard functions must work
🔍 Motherboard Fault Diagnosis Flow
Step 1: Power check
- Measure battery connector voltage → If normal
- Measure main power output → If normal
- Measure chip power supplies → If normal
- Proceed to next step
Step 2: Clock check
- Check 32.768kHz crystal → If normal
- Check main clock crystal → If normal
- Check clock distribution → If normal
- Proceed to next step
Step 3: Reset check
- Check reset circuit → If normal
- Check reset signals → If normal
- Check chip resets → If normal
- Proceed to chip-level diagnosis
Step 4: Chip check
- Check CPU operation → If normal
- Check memory communication → If normal
- Check bus signals → If normal
- May need BGA rework
💡 Motherboard Maintenance and Protection
Daily use protection
- Static protection: Touch metal before handling
- Moisture protection: Avoid humid environments
- Overheat protection: Avoid prolonged high-load operation
- Shock protection: Avoid drops and impacts
Repair precautions
- Static protection: Use anti-static wrist strap
- Temperature control: Don't exceed soldering temperatures
- Time control: Heat each joint ≤3 seconds
- Cleaning: Thoroughly clean motherboard after repair
🎯 Repair Cost-Benefit Analysis
Worth repairing when:
- Sentimental value: PSP with special meaning
- Rare version: Limited edition or special color
- Simple fault: Fuse, capacitor, etc.
- Learning purpose: Want to learn electronics repair
Not recommended when:
- BGA chip damage: High cost, low success rate
- Internal layer damage: Unrepairable multilayer board
- Severe corrosion: Extensive corrosion
- Low value: Used PSP 1000 worth only ¥100-200
📊 PSP 1000 Motherboard Version Differences
Different production batches
- TA-079: Earliest version, best quality
- TA-081: Mid-era version, common
- TA-082: Late version, some component changes
- TA-086: Final version, most simplified
Motherboard compatibility
- Screen compatibility: All versions compatible
- Case compatibility: Same dimensions and mounting holes
- Firmware compatibility: Different versions may need different firmware
- Repair differences: Component locations may vary
🔬 Professional Repair Equipment Recommendations
Basic equipment
- Multimeter: Fluke or UNI-T brands
- Temperature-controlled station: Hakko or Quick brands
- Hot air station: 858D or similar
- Magnifier: LED-illuminated magnifier
Advanced equipment
- Oscilloscope: 100MHz bandwidth sufficient
- BGA rework station: Professional chip repair
- Microscope: Electronics repair microscope
- Programmer: BIOS programming device
Repair experience: PSP 1000 motherboard design is quite mature, with most faults in power section. Capacitor issues have high repair success rates. BGA chip problems require professional equipment—not recommended for beginners.
Safety first: Motherboard repair involves high voltage and precision work. Without experience, seek professional help. Incorrect repairs can cause further damage or safety risks.
Final advice: Before deciding to repair, evaluate PSP value vs. repair cost. Sometimes replacing entire motherboard (used ~¥80-120) is more economical. But for learning or nostalgia, the repair process itself can be rewarding.
参考图片
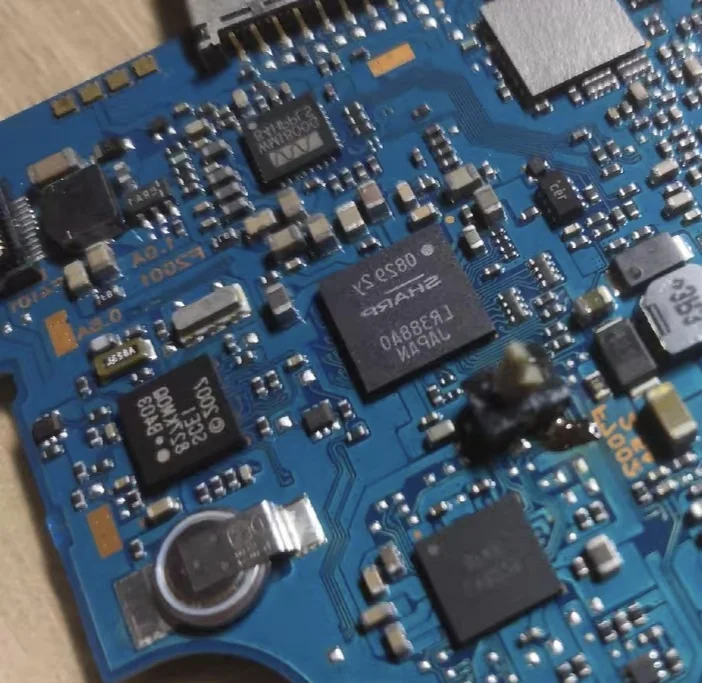
 PSP 1000 motherboard power circuit details - Note capacitor and fuse locations